Showing posts with label Inthekitchen. Show all posts

Friday, July 21, 2017

DIY Serving Platter and Labels

I love to bake for others: Holiday family parties, a group of friends, and especially for an event. This past spring, I volunteered to help make cookies for my alumni's Intervarsity Christian Fellowship coffee house event. I was only asked to make a few dozen, so this was a small bake compared to my yearly Christmas cookie escapade. I chose the classic Chocolate Chip, and also some unique but tasty flavors, Cereal Snaps and Cranberry White Chocolate. Baking the cookies was not my obstacle this time. Instead, I struggled with how to display these cookies when I take them to the event.

My husband and I are not huge entertainers, so we did not register for any type of serving platters or trays when we got married. Not much has changed, and it is physically impossible to host more than a few people at our place, so I have never been concerned with buying trays. For this, I needed something bigger than a plate, but nicer than a baking sheet to display these cookies.

Every Christmas, my grandmother used a simple solution to her displays. She had many serving trays, but to eliminate dishes yet add some decoration, she placed Christmas-themed napkins on the trays. I do have some plain napkins, but napkins would not hide the sides of a worn baking sheet. Something I do have is tissue paper. Lots and lots of tissue paper.
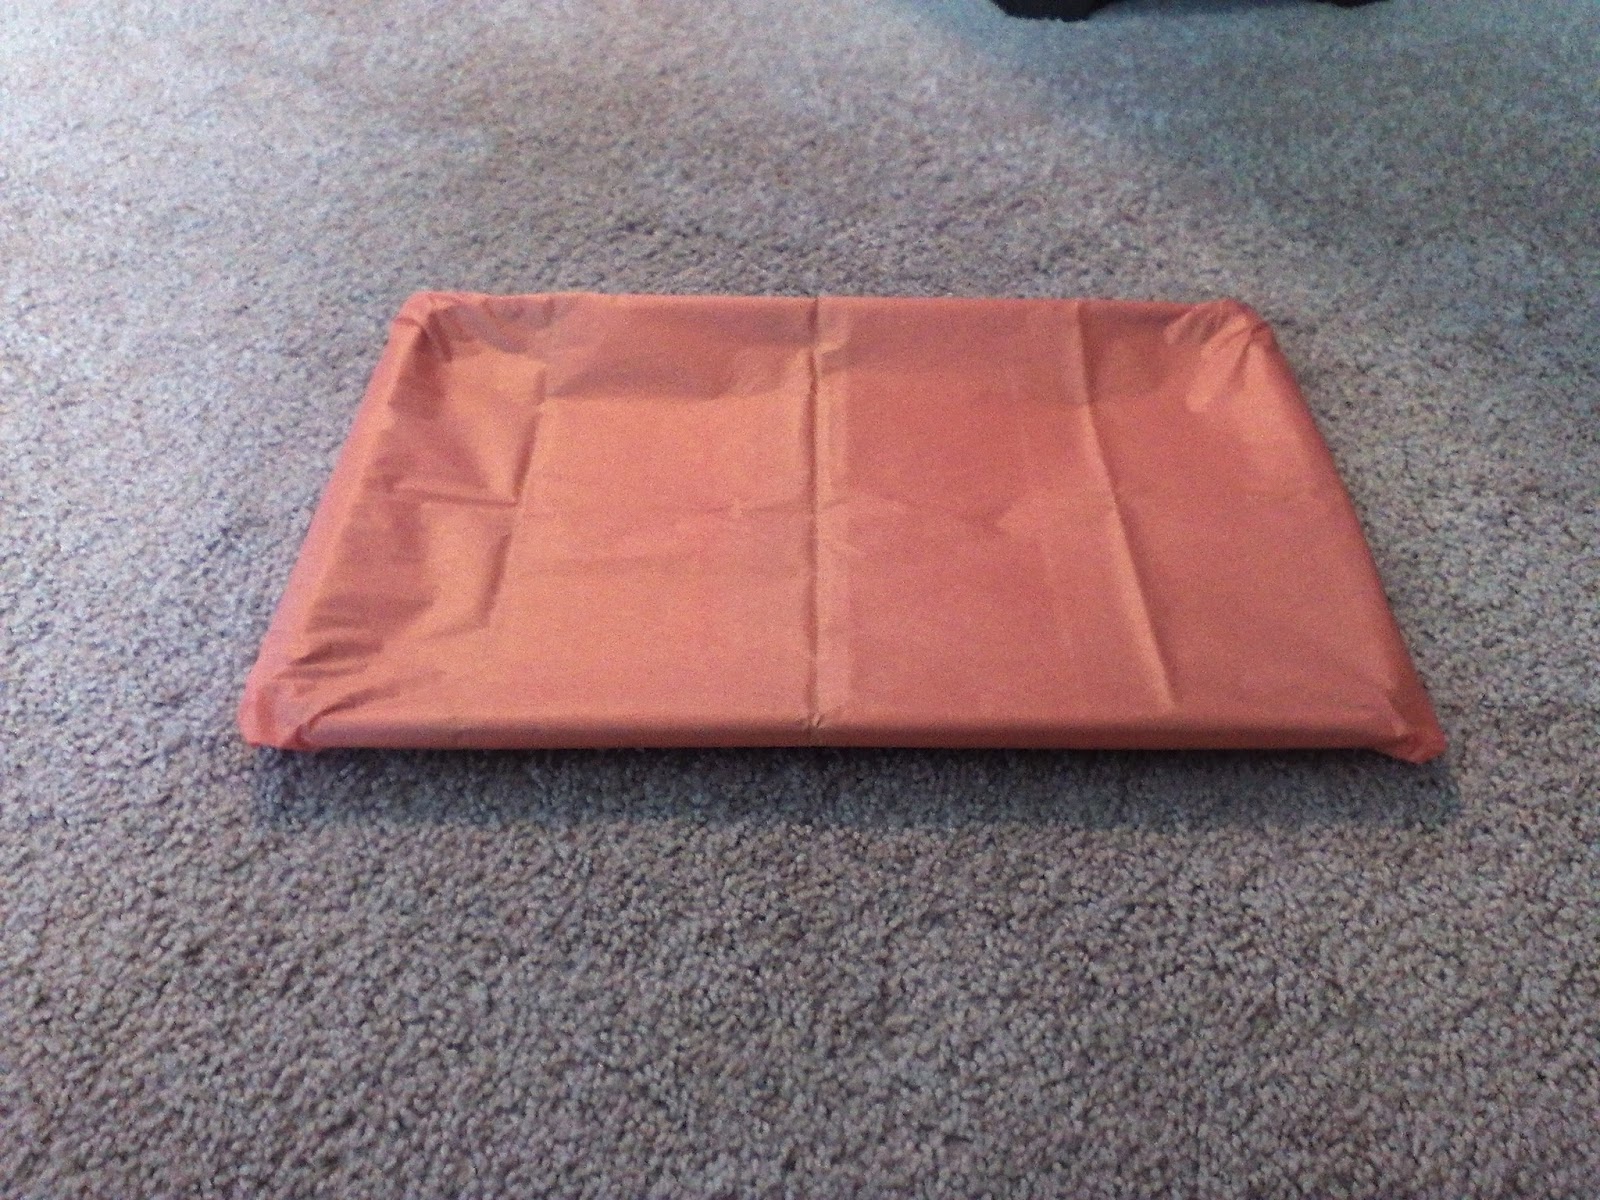
Materials: Baking sheet, tissue paper, tape
Most of this tissue paper I have came from our wedding gifts. It's the signature swirl of Bed Bath & Beyond wedding tissue paper that I saved, thinking I could re-use it for future weddings. Well, 3 years later, and I still have tons of tissue paper. I briefly thought about using this paper, because it is not clearly a wedding-theme unless you recognize it. And let's be honest, as a college student, I had no idea it was wedding paper until I received tons of it for my wedding. But I did some more digging and found an odd color that I most likely would never use. 

I wrapped the baking sheet just like a present, starting with it upside down. I stuck my fingers underneath the baking sheet before I taped each time to press the paper against the inside edge and taped it loosely. Otherwise, the tissue paper would be so tight, it would elevate the cookies off the baking sheet. I didn't worry about the bottom, because it would not be seen. 

The baking sheet only held 2 of my 3 types of cookies, so I needed something smaller than another baking sheet. I chose to use a large plate, but wanted the plate to match the baking sheet. I attempted to wrap the circular plate as a present as well. Anyone who attempts to wrap something circular for Christmas knows how hard it is. But remember, it doesn't have to be perfect! Keeping some sharp edges is okay for this. Trust me, people aren't looking that close at what the food is on...they're looking at the food! 

To transport, I wrapped the trays in saran wrap. 
Something to think about when preparing your trays: If you put the cookies (or any food) on the tray too far ahead of time, be aware there may be a small oil stain by the time you eat. I put my cookies on  about 10 hours ahead of time, and when the cookies were gone, there was an oil stain the size of a quarter or larger. So just be aware that the tissue paper is going to absorb food oils. 
I couldn't even get a quick picture before they started disappearing!

One other touch I always add when displaying more than one type of food is labels. I find that people are more willing to try a non-typical cookie if they know what it really is! All you need is a toothpick, marker, and any type of scrap or colored paper. I am glad I did this because one of the first people that saw my cookies before I had the labels up asked if my Cereal Crisps were peanut butter. (FYI: Cereal Snaps don't have any peanut butter). Imagine the number of people that might have thought that as well, thus not trying it. Save the confusion, label it!

I felt confident taking my cookies to the event on these DIY trays, and the cookies were a hit! 

Update: You can use these platters for almost any type of dessert or snack. For my sister-in-law's bridal shower, I used it for cheese and crackers! I bought a small amount of colored tissue paper that matched her theme and....viola! No dishes to wash, and it looks great! 


SaveSaveSaveSave

Sunday, March 5, 2017

Deviled Eggs- DIY Plate and Piping Tool

Making deviled eggs has always sounded intimidating to me. I have never made them before, but love to eat them. I just assumed it took something fancy to pipe out the yolk and to carry them in because that is how I always saw them. However, I was struggling with an idea to take to a Super Bowl party this year, and decided to tackle my fear for the good of all who love deviled eggs. 

Living in an apartment for several years now, I maxed out my kitchen drawer space long ago. I despise the idea of buying all these kitchen gadgets just for one recipe. So I wanted to find a way to make these without all the fancy gadgets. I was able to make several adaptations, specifically in how I piped out the yolk and how I transported/displayed them. Therefore, I will not post a recipe in this post, as it will work with any recipe. 

Deviled Egg Plate Substitute
The first issue is what to carry and display them in. My first thought was a 9"x13" dish. However, when I tested it out with a few empty egg cups, it proved to be messy and they slid everywhere. I didn't want to chance tipping the container and making a mess of them before they even got to the party. So I tried to think of something that I could place on the bottom of the dish to prevent it from sliding. 
Place cling wrap with wrinkles on the bottom of the pan to prevent the eggs from sliding.
Mine could have used more wrinkles as some eggs slid between the wrinkles.

My final result: Cling wrap that is intentionally wrinkled. Even when the eggs were a bit wet (from rinsing them), they caught on the wrinkles, preventing them from sliding. It also does not take away too much from the clean look as a paper towel or tin foil might. 
No slide!
Piping Tool Substitute
The second issue is the most obvious issue. There are many tools out there that help you to make a beautiful design with your yolk filling. Although that is something I think I would really enjoy, the tools are often large and I did not gain any space in my kitchen since writing the intro to this post. 
This is an issue that many bakers encounter if they just do an occasional icing recipe here and there and do not want to spend the money on the fancy icing bag. The most common DIY tool for this instance is a good old ziplock bag. 

I cut a very small corner off the tip of a small ziplock bag, turned it inside out over my hand, and scooped the yolk filling into the bag, turning it back so I could squeeze it out.


This was about 1 second before the
plastic tip blew through the bag!

A funny experience accompanied this experiment. I had the brainy idea to use a plastic fancy tip that I saved from a Christmas icing bag several years ago. I decided to try to use it with the ziplock bag (you can see it in one of the pictures). However, when squeezing the bag, the thickness of the filling pushed the fancy tip right through the bag hole, leaving me with quite a mess of filling. Luckily I didn't have to waste any of it and just scooped it back into the bag. I am thinking that the sturdiness of an actual icing bag might be worth the money if you want to try any fancy tip 😂 


I did a comparison of looks in which I used a spoon, the ziplock bag, and the fancy tool which I borrowed from a family member. Obviously you can see which is the prettiest to use, but you can also see that it is easy and creates a smooth look to use a ziplock bag.  
Left 2 eggs: spoon; Middle 2 eggs: ziplock bag; Right 2 eggs: fancy tool

Both of the adaptations that I made to the deviled eggs worked perfect for me. They were a huge hit, and didn't make a mess getting there. I didn't have to spend any money or store new tools in my laundry room (the only place of storage for anything right now). Once I get my own kitchen with more storage, then I will probably invest in at least one of the tools as long as I continue to make them for social gatherings. The tools and gadgets of today often make food look clean, fancy and easier to make. But sometimes you just have to be practical. And that's what this blog is all about. 
Enjoy!


Monday, March 21, 2016

When you don't have an appetite...

An appetite is something that we take for granted.

When we don't have an appetite because of sickness, nervousness, busy-ness or other reasons, eating is often the last thing on our mind. As a person who loves food, when there is no appetite, it is a sad day. As a person who has a tendency to get low blood sugar, when there is no appetite, it is a major affliction. A situation that confuses me to my core is that when we are at our weakest, why are we not able to ingest the one thing that we need to re-fuel?


The past two weeks, I have experienced a lack of appetite like never before. I'm sure there are many people who experience this type of lack of food, but for me it was a first. So what do we do when we don't feel well, when we are so busy we don't have time, when we are so stressed we just don't feel like it? But yet, we don't have the energy, strength, time, money or tastebuds to continue?


I pray. 


Where else does strength come from? Food is supposed to provide our bodies with nutrients, help us rebuild our cells, and energize us from within. Even Jesus was hungry after 40 days and nights of fasting (Matthew 4:2). So when our stomaches are empty or our body is trying to heal, I think of Jesus' words when he was tempted with food in the desert: 


Jesus answered, “It is written: ‘Man shall not live on bread alone, but on every word that comes from the mouth of God.’


And boy is that true. Although I believe we really do need nutrients to keep us alive, I also believe when we are unable to do what we need to, God's strength can step in. If it is God's plan to keep us alive or to use us as a testimony, then He will provide us with the strength we need. 


SO what does this post have to do with my purpose of this blog? Why am I not posting a recipe? I haven't been much of a motivated blogger lately and felt the need to post something. But I also haven't been much of a cook for two reasons. First, I haven't had the time. Second, to prep for the crazy month of March and all that it entails for me, I prepped several quick meals to put in the freezer and to make ahead of time to help my sanity and my husband who cannot cook (unless you want a fantastic grilled cheese sandwich every night). As the woman of the house who has the ability to cook, I want to make sure he is taken care of for meals so he can still eat as healthy as possible. I think part of the reason we are still living in a small apartment and don't have pets is due to the traveling and time we occasionally spend away. Sometimes, this is just how life goes. For many people, this is how every day of the year goes.


And it's okay. Because you do what is best for your family, your children, and for you. And when you just can't find the strength, the time, the motivation to cook or eat, there is always someone you can turn to for that strength. 

Monday, December 21, 2015

Cookie Dough: Chilled and Drop vs. Roll-out

Tis the season for christmas cookies! My family has a long history of my grandma in the kitchen baking hundreds of cookies for our family christmas, and then to freeze for year-round goodness. Our family favorites aren't the typical oatmeal raisin, peanut butter blossoms and candy canes. The family favorites include Pineapple Cookies, Carrot Cookies, Sand Tarts (roll out cookies you can decorate, but not sugar cookies) and Grandpa's Cookies. These are all recipes from the Mennonite Community Cookbook that my grandma used heavily. While I never baked cookies with my grandma (that I know of), I love the feeling that we are carrying on her legacy each year and I am proud to be able to bring a piece of her to our family christmas each year.

This year, I wanted to take on the responsibility to make the cookies for our family christmas. I have made all of the cookies before at my mom's house in past years, but this was the first year to do it on my own. In the first and last batch of cookies, I ran into a question and was encouraged to experiment! 

My first question: Do I let chilled dough come to room temperature before baking?
Answer: No, but it's okay if I do for this cookie.

For this experiment, I made Grandpa's Cookies. The dough of my first batch that I chilled was soft enough to scoop right away after being in the refrigerator for over 12 hours. But I wanted to do some research into whether it would make a big difference. 


To make a long story short, it only made a difference in how fast it browned, but this may have been an operator's error (I never said I was a perfect cook!). The only other difference was noticed in the presentation of the flattened vs. not flattened pan where the flattened cookies looked more uniform and smooth. Take a look for yourself:


First batch (cold)- Left side: natural; Right side: flattened


Last batch (room temp)- Left side: natural; Right side: flattened
I also found this explanation (from King Arthur Flour) of why it is a good idea to chill cookie dough in the first place. In the comments section, a viewer asks a vary similar question, and the author notes that it is better to cook the dough right away so the fat stays cold. 
"Chilling cookie dough before baking solidifies the fat in the cookies. As the cookies bake, the fat in the chilled cookie dough takes longer to melt than room-temperature fat. And the longer the fat remains solid, the less cookies spread." 

In other words, if you don't want your cookies to spread, it's best to cook them right out of the fridge or freezer.

My second question: Can I use a roll-out recipe to make drop cookies instead?
My answer: Yes.

For this experiment, I made Sand Tart cookies. While I am a big fan of decorating cookies, I didn't have any decorating items such as sprinkles or icing. I was hesitant to buy some because I don't have any space to store it. I have a great cookie recipe for roll-outs, but would it still work if I didn't want to decorate them and make them a drop cookie instead? So I took a small bit of dough and instead of rolling them out, used an ice cream scoop to make some drop cookies.


Finished drop cookies

They took over double the amount of time to cook than the rolled-out ones. I actually forgot about them so they got more brown than I wanted. Because they aren't a sugar cookie, they did taste a little bland. They also expanded and ended up mega-cookie size! 
Moral of the experiment: Maybe test them by making a few as the recipe calls for first to see how much they expand and how long they truly take to bake. Then adjust by making smaller than usual drop cookies if they expand and prepare for them to cook longer because they are thicker. 
Finished roll-out cookies

I did end up buying some sprinkles and icing. I used up both tubes of icing which was perfect so I don't have to store them. Here are the delicious final product of the rolled-out cookies just for show.

If you are making cookies for the holidays, have fun with it! Let your creativity show. I hope you have a Merry Christmas and a Happy New Year! 


Monday, December 14, 2015

Hot Cocoa Gift Bags

I absolutely love the holidays and sharing the holiday spirit with others. While I believe we should be kind and loving every day, it seems extra easy during the holidays because it's everywhere. 
Last year, our first Christmas season together as a married couple, I wanted to show my appreciation to some people who may not hear it a lot, or should hear it more. I wanted to give to people in the apartment office and maintenance, mailman, work managers and our neighbor.
Last year's gift bags before I added ribbon and a tag

I also love hot chocolate during the winter. I have tried many different flavors such as white hot chocolate, peppermint, dark chocolate, marshmallows and no marshmallows. I had run across a Cinnamon Hot Chocolate Mix on the Taste of Home website and had the idea to create little bags to hand out. I had so much fun with this and loved blessing others with the bags. Plus I made some extra for myself and thought it was just as good, if not better than the store bought packets, but way cheaper per serving!

This was such a simple and quick gift to put together. You can get as creative as your heart desires, and make it your own.


It's as simple as mixing the ingredients together. I mixed the marshmallows right in the cocoa mixture, but if you wanted to present it differently, you could leave them out and place them on top of the mixture in the bag as in the picture on the Taste of Home page linked above.

I bought adorable bags and used some ribbon to tie it together. This year I decided to include a candy cane as well.  I also wanted to put a little tag on it to let them know it's a thank you/appreciation for all they do. Last year I made a tag, but lost it when my computer crashed. So this year I had to recreate it. I looked online for ideas of what to write, as I couldn't remember in the least what I wrote last year. I could not find any Christmas/thank you sayings or tags that were appropriate, so I want to give you a FREE downloadable tag in case you are in the same boat.
This year's finished gift bags
I hope you have fun blessing others with this fun and easy gift!
I'd love to hear if you come up with variations of this gift.


Cinnamon Hot Chocolate Mix 
1 3/4 cups nonfat dry milk powder
1 cup confectioner's sugar
1/2 cup powdered nondairy creamer
1/2 cup baking cocoa
1/2 tsp ground cinnamon
1 cup miniature marshmallows
Additional Ingredients: 3/4 cup hot milk

In a large bowl, combine all ingredients and mix well. Store in an airtight container in a cool dry place for up to 3 months. 

To prepare 1 serving: Dissolve 3 tablespoons of hot chocolate mix in hot milk. 

Yield: about 3 1/2 cups mix (18 servings)


Thursday, November 5, 2015

How Many Potatoes Do I Use?!

One side dish that I have avoided in the past is mashed potatoes. One reason is that there are so many varieties of mashed potatoes that everyone likes, I never know what type to make. My husband loves his mother's sour cream mashed potatoes, my mom makes my grandma's light and fluffy potatoes, and then there's the double baked, casseroles, and just plain baked. So I often just resort to making homemade french fries or only using potatoes in a recipe where they are roasted with other vegetables. 
Then, let's not even get into how to measure how many potatoes to use when a recipe calls for, lets say, 4 cups of mashed potatoes. 

While at my mother's house for the weekend, her recipe called for jambalaya on top of mashed potatoes. So we were determined to figure out how many potatoes it takes to make mashed potatoes, and how many people that would serve. The only way to do that is to measure the pounds of potatoes that we washed and cooked (not the size), and then measure the amount of mashed potatoes it made.

We used 5.87 pounds of small red potatoes (but remember, it shouldn't matter what kind or size of potatoes if we go by pounds). When cooked and mashed, it made exactly 11 cups of mashed potatoes, which is approximately 1 pound of raw potatoes to 2 cups of mashed potatoes. 

What does this mean for how much to make per person? If it's just a side dish at a typical meal, the average person could take between 1/2 and 3/4 cup. This means to serve 2 people at one meal, you would need 1 to 1 1/2 cups of mashed potatoes. Most people make mashed potatoes around thanksgiving to serve to large groups of people. If there will be 10 people at the table, and let's face it, we all take more than 1/2 a cup to eat with our turkey, gravy and corn, I would suggest making approximately 10 cups just to feed each person one time. 


Here's a chart to help you decide how much to make.

Note: I don't know a single person who takes only 1/2 cup of mashed potatoes at any meal. I would say a more realistic serving is 1 cup, so that's what I based the serving size on. Remember, all numbers are approximate. 

Raw potatoes  =  Mashed potatoes  =  Servings 
                                                              (1 cup per person)
1 pound                2 cups                         2 servings
2 pounds               4 cups                        4 servings
5 pounds              10 cups                       10 servings
10 pounds            20 cups                       20 servings   

To give you a visual of how much this is, we put the mashed potatoes in a 2 quart casserole dish. Yes, the potatoes are pink! We used home grown red potatoes that are red all the way through. 
4 cups

8 cups

11 cups
I hope this helps you decide how many potatoes to use and make to feed your family this thanksgiving!